Installing a beautiful hardwood floor can dramatically transform a space, adding value and timeless appeal. However, achieving that perfect, professional finish requires the right tools and techniques. One often underestimated yet critical tool in this process is the flooring mallet. Used correctly, a quality mallet ensures tight seams, secure fastening, and prevents damage to your expensive hardwood planks. This guide dives deep into the world of flooring mallets, explaining why they are essential, how to choose the right one, and the proper techniques for using them effectively during your hardwood floor installation project. Whether you're a seasoned professional like Mark Thompson looking for reliable tools or a dedicated DIYer aiming for perfection, understanding the role of the mallet is key to a successful install hardwood project.
As Allen, representing a factory with 7 production lines specializing in high-quality hammers and axes, including mallets exported worldwide (USA, North America, Europe, Australia), I understand the demands of professionals in construction and carpentry. We know quality-sensitive buyers seek durable, ergonomic tools that perform reliably. This article combines our manufacturing expertise with practical installation knowledge to help you master the use of a flooring mallet for impeccable results.
Why is a Specialized Mallet Crucial for Installing Hardwood Floors?
When installing hardwood floors, particularly tongue-and-groove types, achieving a tight fit between planks is paramount. Gaps not only look unprofessional but can also lead to squeaks, movement, and allow dirt or moisture ingress over time. This is where a specialized flooring mallet comes into play. Unlike a standard hammer or even a generic rubber mallet, a flooring mallet is specifically designed to tap hardwood planks together without damaging the wood's surface or delicate tongue-and-groove edges. Its weight and head material are balanced to deliver sufficient force to close gaps effectively but gently.
Using the wrong tool, like a steel hammer, can easily dent, crack, or splinter the hardwood, leading to costly waste and aesthetic flaws. Even some generic rubber mallets might lack the necessary weight or have a head that marks the finish. A proper flooring mallet, often with a non-marring head (like white rubber or dense plastic) and appropriate heft, ensures the plank edges engage fully and lie flat against the subfloor. This secure fit is crucial before fastening with a nail or staple, guaranteeing a stable and long-lasting hardwood floor. Many customers find the mallet an indispensable part of the wood floor installation toolkit for precisely this reason.
The force applied by the mallet needs to be controlled yet firm. The goal is to nudge the boards into place, ensuring the tongue fits snugly into the groove of the previous row. This careful tap action, guided by the flooring mallet, prevents damage that could compromise the integrity of the hardwood floor. It’s a critical step that sets the stage for secure fastening and contributes significantly to the overall quality and longevity of the new floor. Investing in a good flooring mallet is investing in the quality of your wood flooring project.
What Are the Different Types of Mallets Used for Hardwood Flooring?
While the term "flooring mallet" is often used, several types of mallets can be employed depending on the specific task and type of hardwood being installed. Understanding the differences helps in selecting the best tool for the job.
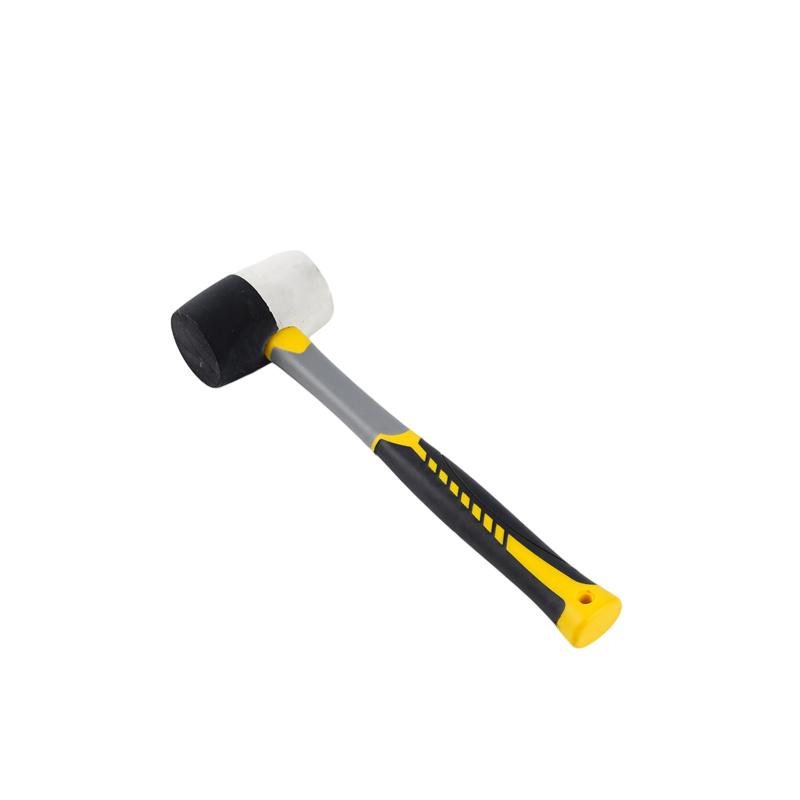
- Dedicated Flooring Mallets: These are the gold standard. They typically have a unique head design – often a combination of a non-marring face (white rubber or high-density plastic) for tapping the hardwood directly and sometimes a harder face (steel or different plastic) for striking the actuator on a pneumatic flooring nailer or stapler. Their weight (usually 2-3 lbs) is optimized for setting hardwood planks without excessive force. The non-marring face is crucial for protecting the wood flooring finish.
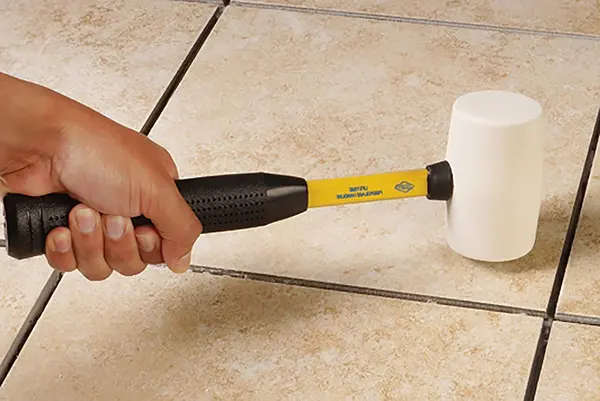
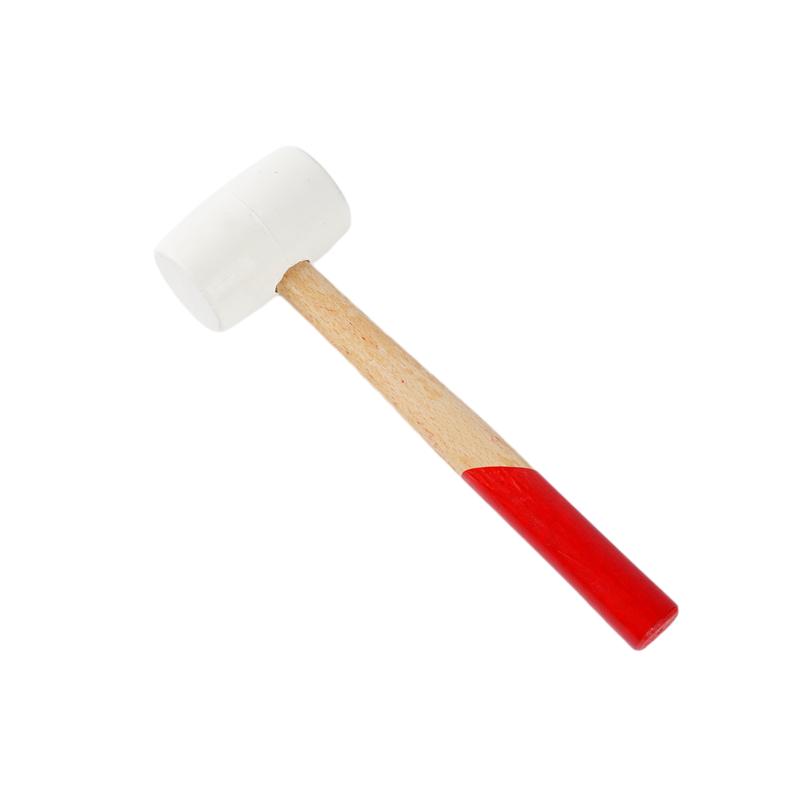
- White Rubber Mallets: A good quality white rubber mallet (like this Wood Handle Rubber Mallet) is often used. The white rubber is less likely to leave scuff marks on the hardwood compared to black rubber. These are versatile but might lack the specific weight or dual-head design of a dedicated flooring mallet. They are excellent for tapping boards together, especially when using a tapping block.
- Black Rubber Mallets: While functional, black rubber mallets carry a higher risk of leaving black marks on the hardwood floor surface or finish, especially on lighter-colored woods. If used, it's often in conjunction with a scrap piece of wood flooring (tapping block) to avoid direct contact. Some professionals prefer them for striking nailers due to their durability.
- Dead Blow Mallets: These mallets have a head filled with shot or sand, which prevents rebound upon striking. This delivers maximum force transfer with less jarring impact, useful for firmly seating stubborn planks without damaging them. They often have non-marring faces. A Dead Blow Hammer can be very effective.
The choice often depends on the specific flooring type (solid hardwood, engineered wood, even some vinyl plank installations benefit from a mallet) and whether you are using a manual or pneumatic nail gun. For professional results, especially when working with expensive hardwood, a dedicated flooring mallet or a high-quality white rubber mallet is highly recommended.
How Do You Prepare the Subfloor Before Using Your Mallet and Nailer?
Before you even think about swinging your mallet or firing a nail, proper subfloor preparation is absolutely critical for a successful hardwood floor installation. A poorly prepared subfloor can lead to squeaks, unevenness, instability, and ultimately, failure of the new floor. This foundational step ensures your hardwood lies flat, performs well, and lasts for decades.
First, the subfloor must be clean. Sweep and vacuum thoroughly to remove all dust, debris, and any stray fasteners. Any bumps or residues can prevent the hardwood planks from lying perfectly flat. Second, the subfloor needs to be flat. Use a long straightedge to check for high or low spots. High spots (often found at seams in plywood or OSB subfloors) should be sanded down. Low spots should be filled with an appropriate leveling compound and allowed to cure completely. The generally accepted tolerance is a variation of no more than 3/16 inch over a 10-foot radius or 1/8 inch over a 6-foot radius.
Third, ensure the subfloor is structurally sound and dry. Walk over the entire area, checking for squeaks or excessive deflection. Secure any loose plywood or OSB panels to the joists with screws. Address any potential moisture issues originating from below (crawl spaces, basements). A moisture barrier or appropriate underlayment is typically required, especially over concrete subfloors or damp crawl spaces. Always check the hardwood manufacturer's recommendations regarding moisture content for both the hardwood itself and the subfloor – using a moisture meter is essential. Skipping subfloor prep can undermine even the best mallet technique and nail work. Finally, install the recommended underlayment or moisture barrier according to the manufacturer's instructions, ensuring seams are properly taped if required. This layer provides cushioning, sound dampening, and protection against moisture vapor transmission.
What's the Correct Technique to Tap Hardwood Planks with a Mallet?
Using the mallet correctly is more about finesse than brute force. The goal is to gently but firmly close the gaps between hardwood planks, ensuring the tongue-and-groove system engages fully without damaging the wood. Over-swinging or hitting too hard can fracture the edges, mar the surface, or even damage the subfloor connection.
The standard technique involves placing the hardwood plank, ensuring its groove aligns with the tongue of the previous row. Then, using a tapping block (a small scrap piece of the same wood flooring or a purpose-made plastic block), place the block against the edge of the new plank. Tap the block firmly but controlledly with your flooring mallet or rubber mallet. The tapping block distributes the impact force evenly along the plank's edge, preventing direct mallet contact and potential damage. Listen for the sound change – a solid "thud" usually indicates the planks are seated properly together.
Avoid striking the top surface of the hardwood directly with the mallet, even a rubber mallet, unless absolutely necessary and done very gently. The primary contact should be on the edge via the tapping block. Work along the length of the plank, tapping progressively to ensure the entire edge engages smoothly. For stubborn boards, slightly angling the mallet strike on the tapping block can sometimes help coax them into place. Remember, the mallet is used to nudge, not hammer, the boards into place. Patience and consistent, moderate taps yield the best results for a seamless hardwood floor.
How Does a Flooring Mallet Work with a Pneumatic Nailer or Stapler?
A key function of many dedicated flooring mallets is to activate pneumatic flooring nailers or staplers. These specialized tools dramatically speed up the fastening process compared to manual methods. The mallet becomes an integral part of the pneumatic system, providing the necessary impact to drive the nail or staple correctly.
Pneumatic nailers designed for hardwood floor installation typically have a large actuator pad on top. The installer positions the nailer correctly over the tongue of the hardwood plank at the recommended 45-degree angle. Then, using the flooring mallet (often the harder face if it's a dual-head mallet), they deliver a firm, swift strike to the actuator pad. This single strike triggers the nailer to drive a fastener (cleat nail or staple) through the tongue of the plank and into the subfloor. The compressor connected to the nailer provides the air power, but the mallet strike provides the trigger action and helps ensure the nailer is properly seated against the wood flooring.
The weight and balance of the flooring mallet are crucial here. It needs enough mass to reliably activate the pneumatic nailer with a single, controlled swing, but not be so heavy as to cause fatigue or damage the tool over time. Using the correct mallet ensures consistent fastening depth and prevents misfires or jams. While some use a heavy rubber mallet, a dedicated flooring mallet often provides better ergonomics and striking efficiency for this repetitive task, making the install hardwood process smoother and faster. Proper mallet technique is essential for operating pneumatic nailers effectively and safely.
Should You Nail or Staple Your Solid Hardwood Floor?
This is a common question when installing hardwood floors, and the answer often depends on the specific hardwood product, the subfloor type, and manufacturer recommendations. Both specially designed flooring cleats (nails) and narrow crown staples are common fasteners used with pneumatic tools, and each has its proponents.
- Flooring Cleats (Nails): These are L-shaped or T-shaped nails designed specifically for hardwood floor installation. They have smooth shanks or barbed designs.
- Pros: Many installers believe cleats allow for slightly more natural expansion and contraction of the solid wood floor, potentially reducing stress. They are often considered the traditional choice for solid hardwood. They tend to have greater holding power in plywood subfloors.
- Cons: Can sometimes split the tongue of more brittle hardwood species if the nailer pressure isn't set correctly. May require a specific cleat nailer.
- Flooring Staples: These are typically 1/2-inch narrow crown staples, usually 15 or 15.5 gauge.
- Pros: Staples have two legs, which some argue provides a stronger immediate hold, potentially reducing board movement during installation. They can be faster to load into the stapler. Often less likely to split tongues. Can be more effective in OSB subfloors.
- Cons: Some worry that the wider holding area of the staple might restrict natural wood movement more than a cleat nail, potentially leading to issues like buckling in environments with large humidity swings, although this is debated.
Crucially, always consult the hardwood flooring manufacturer's installation guidelines. They will specify the preferred fastener type (cleat nail or staple), gauge, and length suitable for their product and the required subfloor thickness (e.g., 3/4" plywood). Using the wrong fastener (type or length) can void the warranty and lead to installation failure. Whether you use a flooring nailer for cleats or a flooring stapler, the technique involving the mallet to activate the tool remains largely the same. Make sure your pneumatic nail gun is compatible with the chosen fastener.
What Are Common Mistakes to Avoid When Using a Mallet for Wood Flooring Installation?
Even with the right tools, mistakes can happen during hardwood floor installation. Avoiding these common pitfalls related to mallet use will help ensure a professional result:
- Using Excessive Force: Hitting the planks or tapping block too hard with the mallet is perhaps the most common error. This can crack tongues, damage grooves, dent edges, or mar the surface finish of the hardwood. Use firm but controlled taps. Let the mallet's weight do the work.
- Striking the Wood Directly: Always use a tapping block (a scrap piece of flooring or a designated block) between the mallet and the edge of the hardwood plank. Direct mallet strikes, even with a rubber mallet, risk damaging the wood.
- Using the Wrong Mallet: Employing a steel hammer or a marking black rubber mallet directly on light-colored wood flooring can cause irreparable damage or leave stubborn marks. Invest in a proper flooring mallet or a non-marring white rubber mallet.
- Incorrect Angle When Tapping: Tapping straight down onto the edge can sometimes be less effective than a slight upward or downward angle (depending on how the board needs to move) to properly engage the tongue-and-groove. Experiment gently.
- Not Checking for Full Engagement: Failing to ensure the tongue and groove are fully seated before fastening can lead to uneven surfaces and gaps. Tap along the entire length and listen for the solid sound indicating a tight fit.
- Damaging the Nailer/Stapler: When using the mallet to activate a pneumatic tool, striking off-center or with glancing blows can damage the actuator or the tool itself. Use a consistent, direct strike.
- Ignoring Safety Gear: Forgetting eye protection or knee pads during the repetitive motion of tapping and nailing can lead to injury.
Being mindful of these potential errors and focusing on proper technique with your flooring mallet will significantly improve the quality and appearance of your install hardwood project. Remember, patience and precision are key when working with hardwood.
How Do You Handle the First Row and Last Few Rows During Installation?
The first row and the last few rows of a hardwood floor installation present unique challenges where standard mallet and pneumatic nailer techniques might need modification.
The First Row: This is arguably the most critical row as it sets the alignment for the entire floor.
- Straightness: Ensure the first row is perfectly straight. Snap a chalk line accounting for the hardwood width plus the manufacturer's recommended expansion gap (typically 1/2" to 3/4") along the starting wall.
- Fastening: Since the pneumatic nailer usually requires space to operate on the tongue side, it often can't be used effectively on the first row which is close to the wall. This row typically needs to be face-nailed near the wall edge (where the holes will be hidden by baseboard or molding) and blind-nailed through the tongue at a 45-degree angle.
- Manual Nailing: Use finish nails and a hammer or a finish nail gun. Pre-drilling pilot holes, especially near board ends, can prevent splitting. Use a nail set to sink the nail heads slightly below the surface for face nailing. A mallet might still be used gently with a tapping block to ensure the first row boards are tight against each other before fastening.
The Last Few Rows: As you approach the opposite wall, the space becomes too tight to swing a flooring mallet effectively or position the pneumatic nailer.
- Measuring & Cutting: Carefully measure the width needed for the final rows, remembering to account for the expansion gap. You may need to rip (cut lengthwise) the last row of planks using an electric miter saw or table saw.
- Tightening: A pull bar is often essential here. This tool hooks over the edge of the plank and allows you to tap its other end with a hammer or mallet to pull the last rows tightly together.
- Fastening: Similar to the first row, the last few rows usually require face nailing close to the wall (covered by baseboard) and potentially some careful blind nailing by hand or with a finish nail gun. Sometimes wood glue (adhesive) is used in conjunction with nails on the last row for extra security. Avoid using the main flooring mallet directly as space is limited and control is difficult.
These areas require more patience and often involve hand tools like hammers, finish nails, a pry bar, a pull bar, and careful measurement with a tape measure.
What Safety Precautions Should Be Taken When Using a Mallet and Nail Gun?
Safety should always be the top priority during any construction or installation project, including installing hardwood floors. Using tools like mallets and pneumatic nail guns involves potential risks that need to be managed.
- Eye Protection: Always wear safety glasses or goggles. Wood chips, flying debris, misfired nails or staples, or even fragments from a mallet head can cause serious eye injuries. This is non-negotiable.
- Hearing Protection: Pneumatic nailers operating off a compressor can be loud, especially indoors. Prolonged exposure can damage hearing. Consider using earplugs or earmuffs, particularly during long installation sessions.
- Knee Pads: You'll spend a lot of time kneeling. Quality knee pads protect your joints from strain and impact, making the wood floor installation process much more comfortable and preventing long-term issues.
- Gloves: Work gloves can protect your hands from splinters, blisters from repetitive mallet use, and minor cuts. They can also improve grip.
- Proper Tool Handling:
- Never point a pneumatic nail gun at yourself or anyone else.
- Disconnect the air hose from the compressor when clearing jams, making adjustments, or leaving the tool unattended.
- Use the correct air pressure setting recommended for the nailer and hardwood.
- Ensure the mallet head is secure on the handle. Inspect mallets for cracks or damage before use.
- Keep fingers away from the nail discharge area and the point of impact when using the mallet.
- Work Area Safety: Keep the work area clean and free of clutter (scrap wood, cords, tools) to prevent trips and falls. Ensure adequate lighting.
Taking these simple precautions seriously minimizes the risk of accidents and ensures your focus remains on achieving a high-quality hardwood floor finish. Remember that reliable tools, like a well-maintained Performance Tool Ball Pein Hammer (though not directly for flooring, it highlights tool quality), contribute to safer operation.
Beyond the Mallet: What Other Tools Complement Hardwood Installation?
While the flooring mallet is essential, it's just one part of a larger toolkit needed for a professional hardwood floor installation. Having the right complementary tools ensures efficiency, precision, and a better final result.
Here’s a list of commonly used tools alongside your mallet and flooring nailer/stapler:
- Measuring Tools: Tape measure, chalk line, pencil, square, potentially a 10” contour gauge for fitting around irregular shapes (pipes, doorway trim).
- Cutting Tools: Electric miter saw (for precise cross-cuts), table saw (for ripping planks lengthwise), jigsaw (for curved cuts), utility knife (for underlayment and packaging).
- Safety Gear: Safety glasses, knee pads, gloves, hearing protection.
- Subfloor Preparation: Broom, vacuum, scraper (for removing old adhesive or paint), straightedge, level, sander (for high spots), subfloor leveling compound.
- Fastening Tools: Flooring nailer or stapler, air compressor and hose, hammer, finish nail gun (optional, but helpful), nail set, finish nails, flooring cleats or staples.
- Layout & Fitting Tools: Tapping block (scrap wood), pull bar (for last rows), pry bar (for adjustments and removal), screwdriver (for removing vent covers, etc.).
- Adhesives & Sealants: Wood glue (sometimes used on joints or last rows), underlayment tape.
- Cleanup: Shop vacuum, rags.
Having these tools readily available streamlines the workflow. For instance, accurately cutting pieces with a miter saw ensures they fit snugly when you tap them together with the mallet. The pull bar becomes indispensable when the mallet can no longer be swung effectively. Each tool plays a role in achieving that seamless, professional hardwood look.
Maintaining Your Mallet and Flooring Tools for Longevity
Investing in quality tools like a good flooring mallet, pneumatic nailer, and saws is only part of the equation. Proper maintenance ensures they perform reliably for years, protecting your investment and preventing project delays – a key concern for professionals like Mark Thompson dealing with tight schedules.
- Mallet Care:
- Cleaning: Wipe down your mallet after each use to remove dust and debris. If using a rubber mallet, ensure no adhesive or finish residue hardens on the face.
- Inspection: Regularly check the mallet head for cracks, chips, or excessive wear, especially on non-marring faces. Ensure the head is tightly secured to the handle. Replace damaged mallets immediately – a failing mallet head can be dangerous.
- Storage: Store your mallet in a dry place to prevent handle deterioration (especially wood handles) or corrosion on metal parts.
- Pneumatic Nailer/Stapler Care:
- Oiling: Most pneumatic nailers require regular oiling (a few drops into the air inlet before use) as per the manufacturer's instructions. This lubricates internal parts and prevents premature wear.
- Cleaning: Keep the tool clean, paying attention to the nail magazine and firing mechanism. Blow out dust with compressed air.
- Inspection: Check for air leaks, worn O-rings, or damage to the driver blade. Ensure safety mechanisms are functioning correctly.
- Storage: Store in its case in a clean, dry environment.
- Compressor Care: Drain the air tank regularly to remove condensed moisture, preventing internal rust. Check oil levels if applicable. Keep air filters clean.
- Saw Blades: Keep blades sharp for clean cuts. Dull blades can burn hardwood and require more force, potentially leading to less accurate cuts and increased danger.
Regular maintenance not only extends the life of your tools but also ensures they operate safely and efficiently. A well-maintained mallet delivers consistent taps, and a clean, oiled nailer drives fasteners reliably, contributing to a smoother, faster install hardwood process and preventing the kind of delays that disrupt business. Many customers find the mallet and other tools last significantly longer with basic care.
Key Takeaways for Mastering Mallet Use in Hardwood Installation:
- Choose Wisely: Select a dedicated flooring mallet or a high-quality non-marring (white) rubber mallet suitable for hardwood floor installation.
- Prep is Paramount: A clean, flat, dry, and sound subfloor with the correct underlayment is crucial before any mallet work begins.
- Technique Matters: Use a tapping block and firm, controlled taps with the mallet to gently seat tongue-and-groove planks without damaging them. Avoid excessive force.
- Nailer Integration: If using a pneumatic nailer or stapler, the mallet strike activates the tool. Use a consistent, direct hit on the actuator.
- Fastener Choice: Follow the hardwood manufacturer's guidelines for using cleat nails or staples. Ensure your nail gun is compatible.
- Special Rows: The first row and last few rows require different techniques, often involving face nailing, finish nails, and tools like a pull bar.
- Safety First: Always wear eye protection, knee pads, and consider hearing protection and gloves when using a mallet and pneumatic tools.
- Tool Synergy: The mallet works best as part of a complete toolkit including measuring, cutting, and other specialized flooring tools.
- Maintain Your Tools: Regular cleaning and inspection of your mallet, nailer, and other equipment ensure longevity, safety, and optimal performance.
By understanding the nuances of using a flooring mallet and adhering to best practices for preparation, technique, and safety, you can confidently tackle any hardwood floor installation, achieving durable, beautiful results that stand the test of time. As manufacturers, we pride ourselves on producing reliable tools like our diverse range of hammers that empower professionals and DIYers alike to achieve excellence in their woodwork.
Post time: 04-15-2025