Mastering the Art of Using a Riveting Hammer: A Comprehensive Guide
Are you ready to unleash your inner craftsman? Whether you're a professional metalworker or a passionate DIY enthusiast, understanding how to use a riveting hammer is an essential skill in your toolbox. This powerful tool allows you to join metal components securely and efficiently, creating robust and long-lasting connections. In this comprehensive guide, we'll explore the ins and outs of using a riveting hammer, providing you with the knowledge and confidence to tackle a wide range of riveting projects.
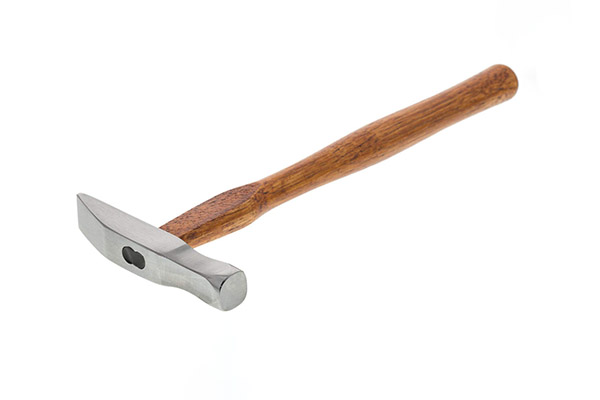
What is a Riveting Hammer?
Before we dive into the practical aspects, let's start by understanding what a riveting hammer is. A riveting hammer, also known as a rivet gun, is a specialized hand tool designed for the installation and removal of rivets. It features a sturdy handle, a striking head, and a mechanism that delivers controlled blows to the rivet, deforming it and creating a strong joint.
Step-by-Step Guide to Using a Riveting Hammer
Now that we're familiar with the basics, let's walk through the step-by-step process of using a riveting hammer:
Step 1: Prepare the Rivet and Workpiece
Begin by gathering the materials you need for your riveting project. This typically includes the rivets, the workpiece, and any necessary supporting tools such as a rivet set or bucking bar. Ensure that the rivet dimensions match the requirements of your project.
Step 2: Position the Rivet
Place the rivet through the pre-drilled holes in the workpiece, aligning them as accurately as possible. If needed, use clamps or a vise to secure the workpiece, ensuring stability during the riveting process.
Step 3: Select the Appropriate Rivet Set
Choose the rivet set that matches the head style and size of the rivet you're using. The rivet set is a specialized attachment that fits into the striking head of the riveting hammer, providing a surface to strike against the rivet.
Step 4: Secure the Rivet Set and Hammer Position
Insert the selected rivet set into the striking head of the riveting hammer, ensuring a tight and secure fit. Grasp the riveting hammer firmly, positioning your hand near the striking head for optimal control and accuracy.
Step 5: Strike the Rivet
With the rivet set in place and your hand firmly holding the riveting hammer, deliver controlled strikes to the rivet. Aim to hit the rivet's head squarely and with consistent force. The riveting hammer's mechanical action will deform the rivet's tail, creating a tight and secure joint.
Step 6: Inspect and Repeat
After each strike, inspect the rivet joint to ensure proper deformation and a secure connection. If necessary, repeat the striking process until the desired result is achieved. Take care not to over-strike the rivet, as this may weaken the joint or damage the workpiece.
Tips for Using a Riveting Hammer Safely and Effectively
Now that you're familiar with the step-by-step process, let's discuss some essential tips to ensure safe and effective use of a riveting hammer:
Tip 1: Wear Personal Protective Equipment (PPE)
When working with a riveting hammer, it is crucial to protect yourself. Wear safety glasses to shield your eyes from flying debris and gloves to provide a secure grip and protect your hands from potential injuries.
Tip 2: Practice Proper Striking Technique
To achieve accurate and consistent results, practice your striking technique on scrap materials before working on your actual project. Focus on developing a controlled and steady striking motion.
Tip 3: Choose the Right Riveting Hammer for the Job
Select a riveting hammer that suits the specific needs of your project. Consider factors such as the size and type of rivets, the material of the workpiece, and the available space for maneuverability. Using the appropriate riveting hammer will ensure optimal results and minimize the risk of damage.
Conclusion
Congratulations! You've now acquired the knowledge and skills to confidently use a riveting hammer for your metalworking endeavors. Remember, mastering the art of riveting takes practice and patience. By following the step-by-step guide, implementing safety precautions, and choosing the right tools, you'll be well on your way to creating strong, secure, and aesthetically pleasing connections. So, grab your riveting hammer and embark on your next riveting adventure with skill and precision!
Post time: 01-19-2024